So here is my latest project...baby blocks! I got this idea from some maternity pictures that someone took and I thought I would use it myself. :)
Friday, July 29, 2011
Thursday, July 28, 2011
The Third Trimester....I can see the light at the end of the tunnel!
So we hit the big 30 today!! (30 weeks that is) And he's going to be here before we know it!
Here's what's been going on the past few weeks:
29 Weeks: Your favorite spot is to be cuddled up on the right side....and normally jabbing your elbow into my ribs! Matt noticed this week that my belly was lop-sided because you were all balled up on my right side.
29 Week Picture
30 Weeks: We went to get a glimpse of you through a 4D ultrasound this week! Not sure who exactly you look like just yet, but we do know that you are as cute as a button! We also got to see how flexible you are because apparently comfortable to you is stretching your legs by bringing both of your feet in front of your face!! So at first you were hiding behind your feet, but then we finally got some pics of you. You are a VERY active baby and kept punching/kicking the nurse every time she rolled over you. :)
Your not a baldy because we found some hair!
Cute little toes!
Sleepy boy yawning
You look like your pouting in this picture. :)
The nurse said your nose is dark because there is a shadow from your feet being in front of your face. :)
Your cuddled up in this picture. Which means you should be a good snuggle buddy!!
Your hand by your face
Your just as precious as we thought you would be and we can't wait to meet you in person!
Saturday, July 16, 2011
What's in a name??
You've heard the question before, "so what's in a name", right? Well when people ask me what were having and I respond a boy, they always ask...well what's his name going to be?? I've gotten some interesting responses from Kipton like...."Is that a family name??"...or...."That's unusual!" Normally I just respond with a smile and say no it's not a family name, I just heard it and loved it!....when I'm really thinking some other things. :) But I do LOVE the name (obviously since this is what I'm naming my son), and I think it is a perfect name for my little man that will be here in 10 short weeks....hopefully, unless he decides to take his time in there. :)
So my latest project was something to showcase his name! I liked this project because I didn't have a wear a mask for once in the sweltering garage....I was just able to sit down at my kitchen table and paint.
First, I painted the letters to hang above the crib. I didn't want just one print like polka dots, so I looked for inspiration online and found a couple different patterns. The color inspiration came from his bedding which we have not gotten yet, but have registered for.
I plan on using a hot glue gun to glue some brown ribbon on the back and hang them over the crib. But I don't have a hot glue gun....still working on that one.
When I found the letters in hobby lobby (50% off of course!), I also found this plaque in the wood/craft section of hobby lobby. I wondered what I could do with it and decided to paint something I could hang on his door to greet visitors. After I painted it, I got some small wood letters and painted those brown.
So here is the name plaque....if that's what you call it.
I couldn't decide whether I wanted the name to be jumbled or straight....so here are both options. I'll make my final decision later when I get that hot glue gun, and then also glue on a brown ribbon so it can hang on the door.
Here they are together! Cute huh? :)
Changing Table/Dresser
So here is my latest baby room project, drum roll please.....the Changing Table/Dresser. This was a big deal to me because I didn't want to mess it up. :) This old dresser came from an estates sale a few years ago where my mother bought them for a wedding gift for me and Matt. This piece, a bed, and another dresser was our first bedroom set as newlyweds. I convinced Matt to buy new bedroom furniture for us about a year ago so the old estate sale pieces were kicked out to the spare bedroom. So instead of just sitting in our spare bedroom as a drab old piece of furniture...I thought it would be perfect for Kipton's room!
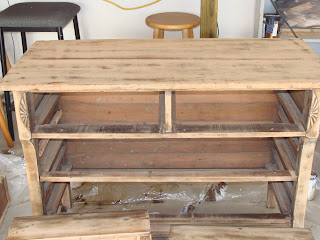
So here she is....the antique, pure wood dresser. This really is a beautiful piece of furniture with details all over it, including the really neat key holes for the drawers but sadly I don't have them...their long gone.
After staining, this is were I was taking a risk. I new I wanted some blue on the dresser, but it really scared me to think of painting this beautiful piece of furniture. But, I decided to take a leap of faith and I painted the dresser drawers blue and left everything else stained.
So here she is....the antique, pure wood dresser. This really is a beautiful piece of furniture with details all over it, including the really neat key holes for the drawers but sadly I don't have them...their long gone.
See the detail and key holes!
A little scratched on the top too, but nothing a good sanding won't fix!
So what I did was sand this baby down to her bare essentials.
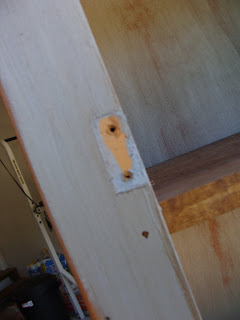
I also had to use some wood filler to patch a big dent in one of the drawers.
After a good sanding, I stained her not once but twice for that dark wood color I was looking for.
Stain number 1...
Stain number 2...
After staining, this is were I was taking a risk. I new I wanted some blue on the dresser, but it really scared me to think of painting this beautiful piece of furniture. But, I decided to take a leap of faith and I painted the dresser drawers blue and left everything else stained.
I was very pleased with my decision! :)
After painting the drawers blue, I gave them the ole' distressed look and added some new knobs. (that I got at Hobby Lobby for 50% mind you!)
So after a lot of sweat and worry, here is the final product! This baby is going to see a lot of dirty diapers. :)
Thursday, July 7, 2011
Bookshelf for Kipton
So once again, while browsing at the Nashville Flea market I was looking for a tall, skinny bookshelf. When I ran across this piece it had a door with a crow painted on it. Although it would be cute for a country kitchen....crows really aren't the theme I'm going for for Kipton's room. So I asked the guy if he took the door off could I have it for a cheaper price?? He eventually said yes and I brought him down $20. This definitely racked up as the most expensive piece of the Nashville Flea Market trip coming in at a whopping $60, but I liked it well enough so I took it.
So here's what I did:
I had to use some wood filler for the holes where the crow door once was. After some wood filler, I sanded her down just to take the roughness off.
Then I stained the whole thing.
I decided to stain the inside twice, leave it stained, and just paint the outside.
I thought it turned out pretty good! Now I just need some stuff to put on it....
Tuesday, July 5, 2011
Don't Judge a Cabinet Door by it's Cover
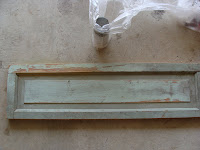
So while I was wondering through the Nashville Flea Market back in May, my friend Christine and I stumbled upon some old cabinet doors. I can't remember the exact price, but I'm pretty sure we brought him down to buying 3 for $20....so around $6 a piece. I got a smaller one (the green) and a larger one (the white).
First I stripped them with some harsh chemicals, and yes I took extra precautions since I'm preggo.
After staining, I painted them two different colors of blue, because I didn't want them to match completely. So this just makes them coordinate very well together.
On one cabinet door I found so hooks from Hobby Lobby that were %50 off! So, they were $2.50 a piece after discount. I screwed this little babies in and voila!! A cute, rustic looking coat rack! (or whatever you want to hang on it...not necessarily coats) :)
One the other cabinet door, I decided to get creative. I've seen all those expensive stencil type planks you can buy and I decided to do my own. I painted on this verse for my little Kipton and this will hang over the changing table. I thought the verse needed a little extra something, so I also painted a cross.
Here's what I decided to do with the little gems....
First I stripped them with some harsh chemicals, and yes I took extra precautions since I'm preggo.
Then, I sanded them down as best as I could.
After a good buffering, I stained them both a dark walnut brown.
After staining, I painted them two different colors of blue, because I didn't want them to match completely. So this just makes them coordinate very well together.
After letting the paint dry, I distressed the edges and a few other areas to give it that rustic look.
I forgot to take pictures of the once green cabinet door, so here is the white one.
On one cabinet door I found so hooks from Hobby Lobby that were %50 off! So, they were $2.50 a piece after discount. I screwed this little babies in and voila!! A cute, rustic looking coat rack! (or whatever you want to hang on it...not necessarily coats) :)
So here she is, the little green door turned into fantastic rustic blue coat rack!
One the other cabinet door, I decided to get creative. I've seen all those expensive stencil type planks you can buy and I decided to do my own. I painted on this verse for my little Kipton and this will hang over the changing table. I thought the verse needed a little extra something, so I also painted a cross.
Here it is!
Subscribe to:
Comments (Atom)


